LCD With Arduino Uno
How to Interface LCD with 4-bit interface and making animations in Arduino Uno


Introduction
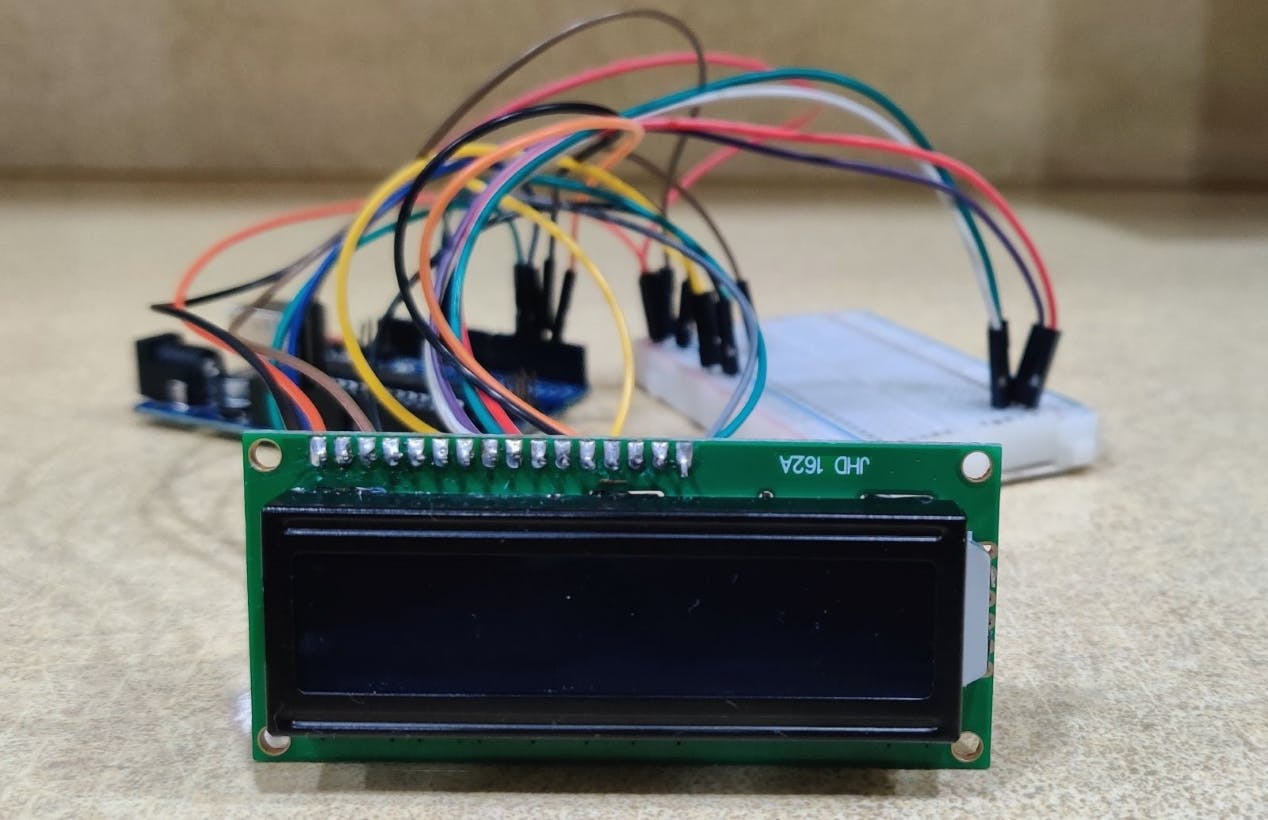
I have interfaced LCD with Arduino Uno using 4-bit mode and I have used LiquidCrystal Library of Arduino. Here I created animations on LCD that can be used for some projects or representations. Animations include beating heart animation, circular loader animation and a progress bar animation with progress percentage showing with it.
You can access main repo containing project code here: LCD_LiquidCrystal
You can see demo video here : Demo Video
Table Of Contents
- LCD Interfacing and 4-bit
- Creating a custom character in LCD
- Beating Heart Animation
- Circular Loader Animation
- Bar Loader Animation
LCD Interfacing in 4-bit
Circuit Diagram to Connect Wires in 4-bit Mode
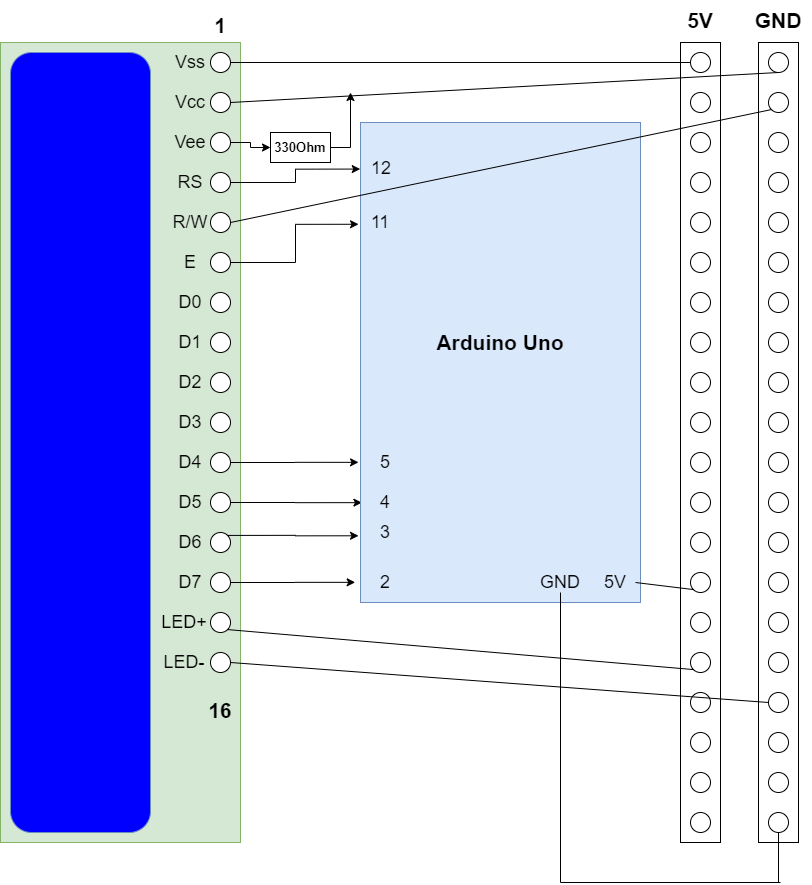
Generally we can connect Arduino with LCD using 4-bit mode meaning using 4 data pins or 8-bit mode where we use 8 data pins. Only difference is in 4 bit mode less pins are used as compared to 8 bit mode and 4 bit mode is a little bit slower but that speed difference can be ignored.
Creating a custom character in LCD
Generally we can type out normal ASCII characters in LCD but we can also make and print special custom characters in our LCD like a smiley face or a heart or a warning sign or error sign and what not.
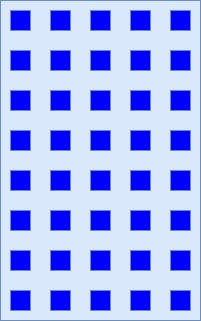
If you zoom in LCD then 1 character of LCD consists of array of 5*8 pixels and we can either on or off each pixel.
Example:
Here we can create a character by turning on a selective pixels, example for a smiley:
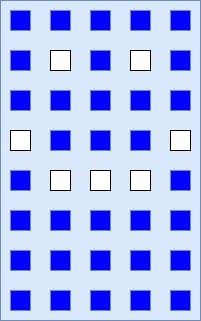
So How to code this? First we make an array representing which bits to turn on and off, of data type byte. Like for a smiley above, array will look like:
byte smiley[8]{
  0b00000,
  0b01010,
  0b00000,
  0b10001,
  0b01110,
  0b00000,
  0b00000,
  0b00000
};
Here there are 8 items in array for 8 rows and every item is a binary number (0b represents binary number). Each bit of a binary number represent 1 column. So first item means all pixel off in first row, second item means 2nd and 4th pixel on and others off and so on.
Now we need to convert this array into something that this LCD can understand. This is handled by a function in LiquidCrystal library which is
lcd.createChar(unique number, name of byte array);
Here, lcd is an object of LiquidCrystal. Unique number is a special number that you assign to your smiley character so that lcd can remember it. Our library can only remember up to 8 characters (0-7).
We need to remember that we need to use createChar and then use lcd.begin(16,2) to initialize all custom chars properly.
Now we can just directly write this on our LCD using:
lcd.write(byte(1));
and ta-da your smiley is printed on LCD 😁✨🎉.
You can study basic code for LCD Here: Basic LCD Integration
Beating Heart Animation
Code here : Beating Heart Animation
Here I created two custom characters one small heart and one big heart and then print big heart, erase it and then print small heart with appropriate delay so it looks like the character is moving and gives the feel of animation.
Circular loader
Coder Here : Circular Loader Animation
Here we created different versions of circle with a particular section missing (4 characters) and then replaced them again and again to give a feel of circle rotating and feel kind of loader animation. Similarly, for a large loader we have 6 characters and replaced them again and again to give feel of big loader animation.
Bar Loader Animation
Code Here : Progress bar Animation
In this I created 5 chars with first row column then first + second column, first + second + third column and so on. Firstly I replaced char 5 times to go from 1 column to 5 columns and then we move next character and so on for 10 times. This will also make our progress bar more smooth. Function I created takes a time input and then loading will complete in that time.
Congratulations!!! We have created animations in simplest output screen like LCD of 16*2 characters 🎉✨🥳.